Configure SharePoint Workflow Manager - The Definitive Guide
/
Andreas Glaser
How to: SharePoint step by step configuration of workflow manager with this definitive guide.
Applies to:
- SharePoint Server Server Subscription Edition 24H1
- SharePoint 2019
Overview
Using workflows, you can model and automate business processes in SharePoint.
There are three different workflow technologies supported by SharePoint :
- SharePoint 2013 Workflow platform
This platform is the recommended workflow platform by Microsoft [1].
As of February 2023, SharePoint Workflow Manager (SPWFM) is used to integrate workflows into SharePoint.
Microsoft Workflow Manager (WFM) and Service Bus are deprecated but supported. [2]
- Power Automate
Power Automate is a new cloud-based workflow platform. It has two limitations:
- Each related user must have a PowerApps Plan 1 license which is not part of the SharePoint Server license.
- Microsoft Flow is currently optimized for non-interactive workflows.
- SharePoint 2010 Workflow platform
This platform is supported for backward compatibility. If you want to create new Workflows please use one of the options above.
SharePoint provides workflows by using SharePoint Workflow Manager, which is based on Windows Workflow Foundation.
There are different tools to develop workflows [3]:
- SharePoint Designer 2013
SharePoint Designer is the primary tool to develop workflows. It’s installed on your local computer and connects to a SharePoint site (you have permission to).
- Visual Studio
Visual Studio is used to develop advanced workflows with custom actions and tasks that can interact with a custom application.
The end user interacts with workflows via a supported web browser like Edge, Firefox, or Chrome.
Back to top
Scenario
I used the following scenario to configure Workflow Manager for SharePoint .
There are different scenarios for installing and configuring Workflow Manager:
- Install Workflow Manager on a SharePoint server. Communication takes place using HTTP or HTTPS.
- Install Workflow Manager on a dedicated server that is not part of the SharePoint farm. Communication takes place using HTTP or HTTPS.
Note about HTTPS:
"For security reasons, Microsoft recommends HTTPS for a production environment." [4] Use HTTP for Product trial, workflow development, and troubleshooting.
I'm going to use the following scenario to install and configure Workflow Manager:
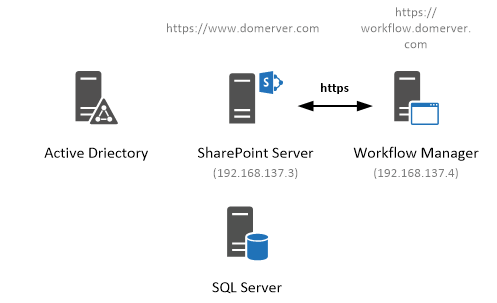
Details:
- Workflow Manager will be installed on a dedicated server.
- SharePoint is already installed and a Web Application + Site Collection has been created. The URL "http(s)://www.domserver.com" returns content, e.g. a team site.
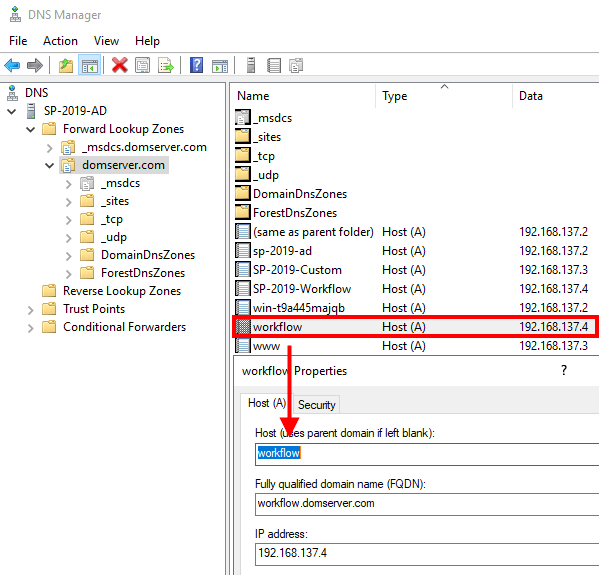
- A "Host (A)" entry for the sub domain "workflow.domserver.com" has been created using "DNS Manager". It points to the Workflows Manager server with IP address 192.168.137.4:
- Communication between SharePoint and Workflow Manager takes place using HTTPS. If you don’t want to use HTTPS you can easily replace it with HTTP during the following process.
Back to top
Workflow Manager Download
Please download SharePoint Workflow Manager downloads and Azure Service Fabric Runtime.
Requirements
There are different requirements for a successful installation and configuration [5].
Please verify the following SharePoint Workflow Manager requirements:
- You need to use a SharePoint Farm Administrator account (e.g. spAdmin). This account needs the following permissions:
- dbcreator and securityadmin on the SQL Server
- Member of the "Administrators" group on every server where Workflow Manager will be installed.
If you are unsure about specific SharePoint requirements please find more information here:
- Please create a domain account (e.g. spWFM) under which the Workflow Manager service will run. This must be a domain account.
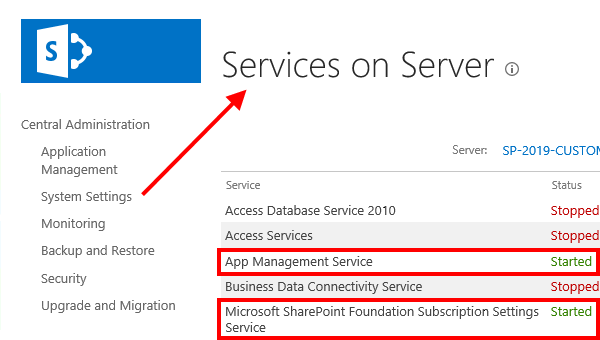
- In SharePoint the App Management Service and Microsoft SharePoint Foundation Subscription Settings Service must be running.
- SQL Server that hosts Workflow Manager databases needs to be configured [6]:
- "Workflow Manager communicates by using TCP/IP or Named Pipes. Make sure that the appropriate communication protocol is enabled on the SQL Server instance that hosts the Workflow Manager databases."
- "The SQL Browser Service must be running on the SQL Server instance that hosts the Workflow Manager databases."
- Firewall has to allow communication over the following ports:
- Workflow Manager Ports: 12290 & 12291
- Service Bus Ports: HTTPS 9355 & TCP 9354
- Message Broker Port: 9356
- Internal Communication Port Range: 9000 - 9004
- (Self-signed) SSL certificates are not allowed to create certificate warnings in your web browser.
- Log on to the Workflow Manager server and successfully ping "www.domserver.com".
- Log on to the SharePoint server and successfully ping "workflow.domserver.com".
Important:
"SharePoint Workflow Manager may not be installed and configured correctly with only RODCs (read-only domain controllers) available in the network environment. It requires a RWDC (read/write domain controller)." [7]
If you didn't successfully install SharePoint please do this first:
Also please make sure sure you have the newest SharePoint Cumulative Updates installed:
Back to top
Installation & Configuration
The following steps apply for every scenario mentioned above. You can change the steps based on your needs, e.g. http or https.
Install Workflow Manager
Log on to every server where Workflow Manager will be installed:
- Install SharePoint Workflow Manager. The installation is done without a GUI.
Back to top
Register Workflow Proxy in SharePoint
The Workflow Proxy has to be registered in SharePoint:
- Log on to a server where SharePoint has been installed using a SharePoint Farm Administrator account.
- Open Central Administration and go to: http://CENTRALADMINISTRATION/_admin/WorkflowServiceStatus.aspx
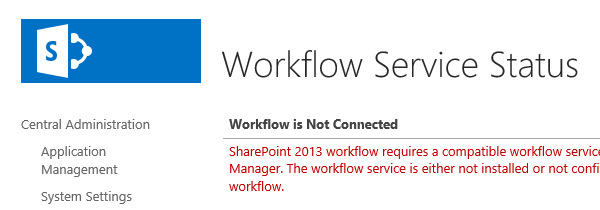
The Workflow Proxy has not been registered yet.
- Open "SharePoint Management Shell" as an administrator and run the following command:
Register-SPWorkflowService -SPSite "https://www.domserver.com" -WorkflowHostUri https://workflow.domserver.com:12290 -force
Parameter SPSIte specifies a URL to an existing site collection.
Parameter WorkflowHostUri specifies a URL to the workflow server.

Important: You must use https for both URLs or http for both URLs. You can’t mix it.
Note: For a non-SSL SharePoint site, the parameter "-AllowOAuthHttp" must be added.
- Refresh the workflow status page to verify if workflow is now connected to SharePoint:
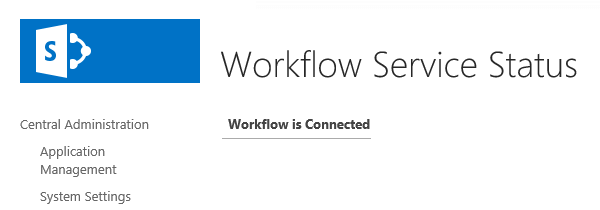
Please have a look at the next section if you get an error message during the registration process.
Back to top
Troubleshooting
I encountered the following issues during different installations of Workflow Manager.
Connection and SSL Certificate Issues
You want to register your Workflow proxy in SharePoint using "SharePoint Management Shell":
Error
Microsoft.Workflow.Client.InvalidRequestException: Failed to query the OAuth S2S metadata endpoint at URI 'https://SHAREPOINT-SERVERNAME/_layouts/15/metadata/json/1'.
Error details: 'An error occurred while sending the request.'.
HTTP headers received from the server - ActivityId: 43b6895a-6cec-44f7-a6b7-89efaaebd15e.
NodeId: WORKFLOW-SERVERNAME. Scope: /SharePoint. Client ActivityId : ce7cf99e-d231-1031-22d6-80126e9a7bda. --->
System.Net.WebException: The remote server returned an error: (400) Bad Request.
Reasons
One of the reasons can be connection issues:

Another reason can be a certificate error if you open your SharePoint site:

Solutions
Please make sure you can access "https://workflow.domserver.com:12290/" from your SharePoint server you run the management shell on:
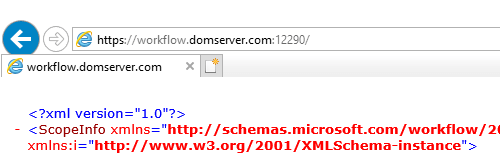
(Log in using an Workflow Manager Administrator account if required.)
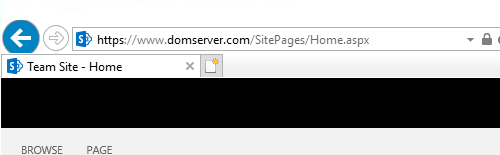
Make sure you can access your Web Application you want to connect to Workflow Manager (e.g. https://www.domserver.com/) on the Workflow Manager server:
Also make sure:
- The certificate is issued for the URL you are using
- Any self-signed certificate in a test environment should be added temporarily to the "Trusted Root Certification Authority" on the SharePoint server where you run the management shell and on the Workflow Server. Restart Internet Explorer and open the SharePoint site again.
Back to top
Permission Issues
You want to register your Workflow proxy in SharePoint using "SharePoint Management Shell":
Error
Microsoft.Workflow.Client.InvalidRequestException: Failed to query the OAuth S2S metadata endpoint at URI 'http://sp-2019-custom/_layouts/15/metadata/json/1'.
Error details: 'The metadata endpoint responded with an error. HTTP status code: Forbidden.'.
HTTP headers received from the server - ActivityId: 69be2f1d-dd90-4aaf-a6a3-442a4622432c.
NodeId: SP-2019-WORKFLO. Scope: /SharePoint. Client ActivityId : 037ff99e-82e9-1031-22d6-82a52cdc96c6. --->
System.Net.WebException: The remote server returned an error: (400) Bad Request.
Reason
The Workflow Manager service account doesn’t have permission to access the Web Application you want to connect to the Workflow Manager.
Solution
Open "Central Administration > Application Management", select your Web Application you want to connect to Workflow Manager and click on "User Policy":
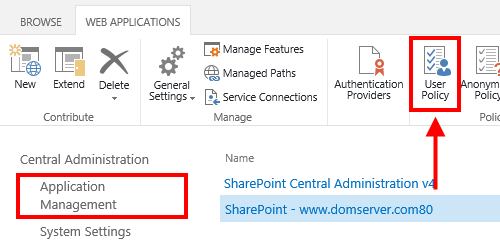
Add the Workflow Manager service account and give it “Full Read” permission:

Back to top